Showing posts sorted by relevance for query igloo. Sort by date Show all posts

Thursday, December 16, 2010

Marshmallow Igloo

My oldest is studying the Inuit people and the arctic at school right now, and he is totally fascinated by all of it, which I love. His class was planning to do an art project of building igloos from marshmallows, and he was so excited! The morning of the day when the big project was going to happen, he woke up with pink eye! He was devastated when I told him that he wasn't able to go to school. There were tears.

So I went to the pantry, and we came up with our own version of the craft. (I'm sure the one at school would have been cooler, but we had no idea what we were doing and just made it up as we went. It didn't turn out too badly though.)

We started with a white foam cup, and he cut an archway out to be the entrance to the igloo.


Then we used white glue around the edge of cup and stuck it onto a white foamy plate.

I gave him a paintbrush and he painted white glue around the bottom of the cup.

And he added mini-marshmallows all the way around.

Paint another ring of glue around the cup above the first layer of marshmallows, add marshmallows, repeat, repeat, repeat...

He kept going and going, and when the cup was covered, he had his igloo. He enjoyed making this one so much, he dug out more supplies and made one for each of his siblings.

Another tragedy averted!

Thursday, March 31, 2011

Sugar Cube Igloo

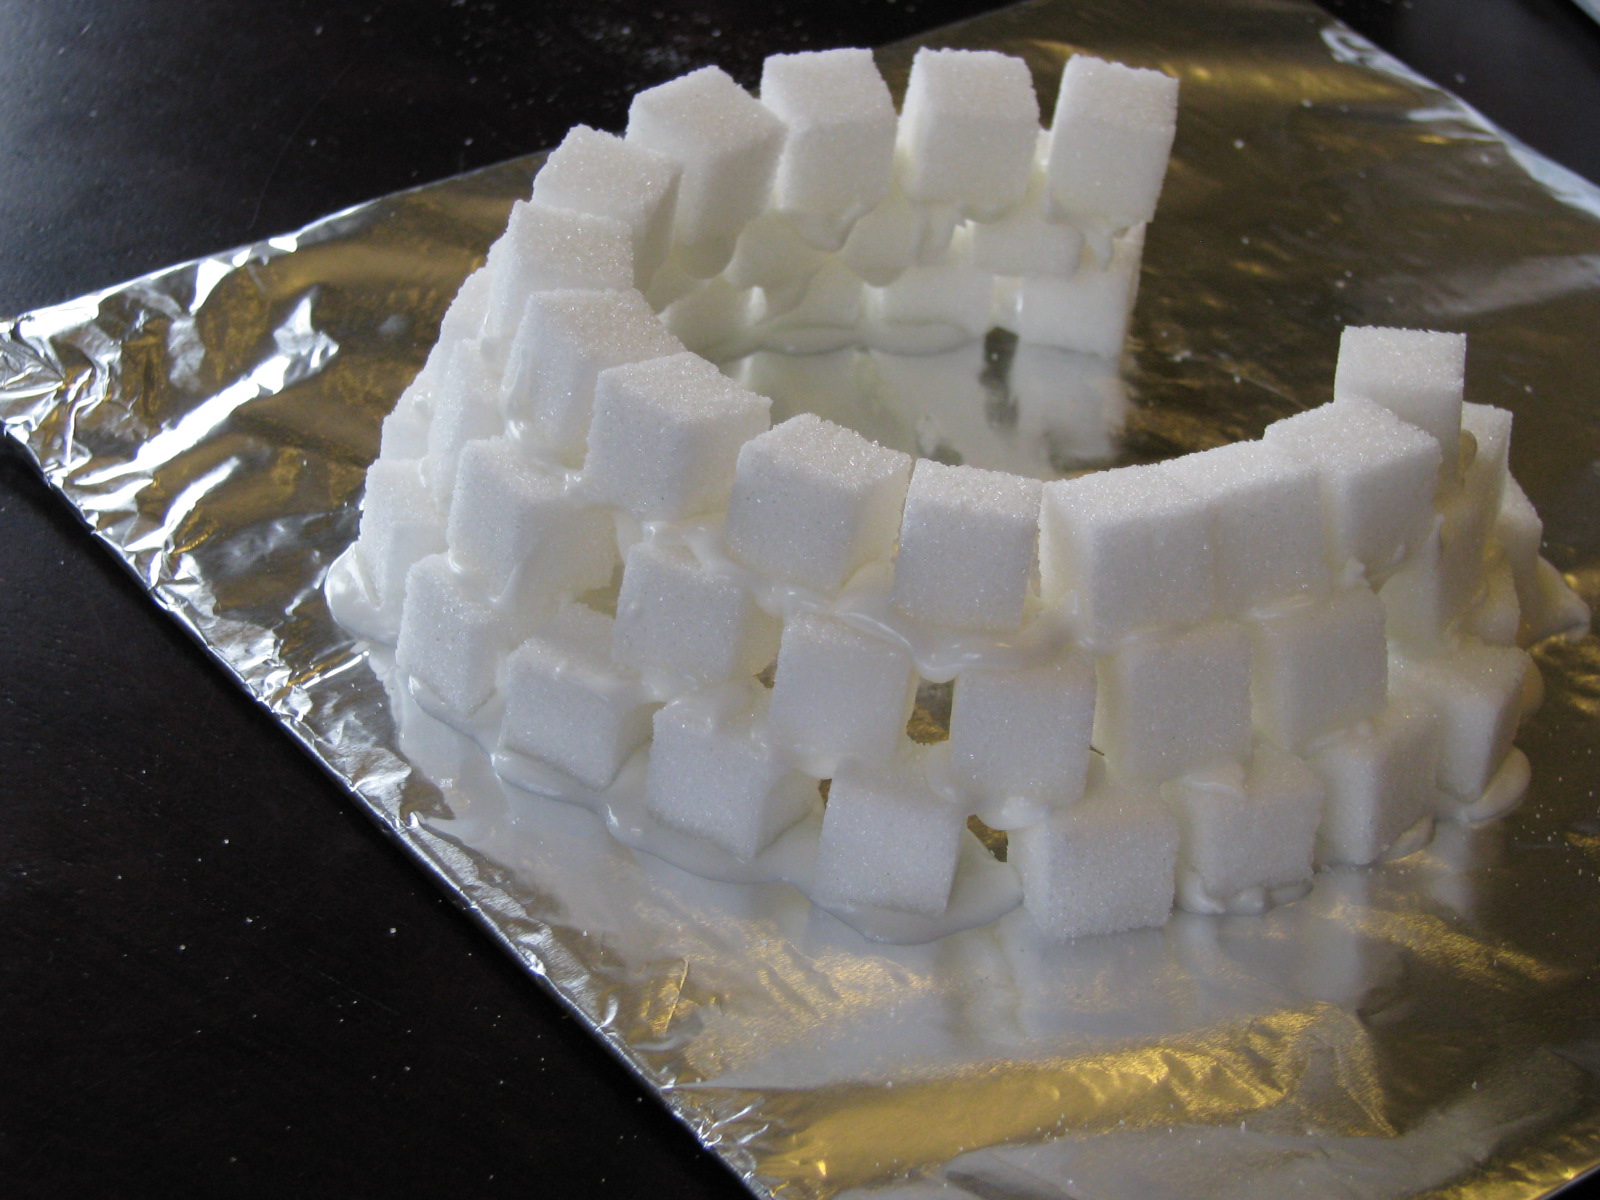
I am sure there are many tutorials to be found on how to make this project. And this probably would have worked out more beautifully if I had read them. But, it was still fun, and you can tell what this is supposed to be. I hope! I started by making a batch of royal icing to use as the glue. My recipe calls for 3 egg whites, 4 cups of sugar, and 1/2 teaspoon of creme of tartar. Mix it until it is smooth. Easy as can be. Once I had my icing ready, I got the rest of the supplies out: a small box of sugar cubes, a knife, and I cut the side off a cardboard box and covered it with tinfoil to use as our base. I also traced a mixing bowl with the tip of a pen to leave a marking on the foil to help us make a round igloo.
We used our knives to spread a little icing on the sugar cubes, one at a time. I didn't try to put icing on the sugar cubes that were already assembled on the igloo because I thought the structure would collapse from the pressure of the spreading. I suppose you could try piping it on, but that still feels risky to me.


We followed along the outline of the circle, and left just small cracks between each sugar cube. (they can't fit tight together because the sugar is a square, and the structure is a circle). We were also careful to leave an opening for the door.


Then we added the next ring, putting the next sugar block over the gap between the ones below. We also moved our ring closer to the center of the circle so that the layers would eventually taper at the top.


To build the door, I made this arch flat against the table. Then when it was dry, I could stand it up and it didn't fall apart. I acutally made two of them, so that one could stand out from the main structure a bit.


After we had our dome shape about half way done, we decided to let it harden up a bit before we added any more. (I really didn't want it to collapse!) *tip: be sure to cover up the icing in the bowl, or it could get hard and not work for you when you come back to finish the rest!


We left it for about half an hour, and when we came back, it was nice and firm and able to support more cubes.


We came back and kept building up and up and up, trying our best to stagger the blocks over the cracks from the last layer. I propped up the entrance and we attached it with some icing.

Since we had some left over icing, we spread it all over the base so it would be white like snow.


Then inspiration hit, and we put a couple of tablespoons of icing sugar in our sieve, and we let it gently fall over the whole thing. Just like a fresh flurry!


I think it turned out really well, and it didn't take as much time as I thought it might.


The kids have all asked if we are allowed to eat it now that it is built. (I think they are remembering gingerbread houses from Christmas, where first you build it, then you sample it. Funny!)

Monday, April 11, 2011

Letter Of The Week - I


Again, catching up on our letter-of-the-week posts. 'I' was a great week. It was challenging to think of themes for the days that I could come up enough activity for, but once I got going, we made out pretty well!


Day One:


The letter page we made was decorated with Ichiban noodles. I could not come up with a craft supply that starts with I. Well, except for 'ink' but we had done stamping on our letter D, and I didn't want to repeat it. If you have any other ideas, please leave me a comment and let me know!


To make the Ichiban more appealing as a craft material, we crumbled it up and painted it. Then when the paint was dry, we glued it by clumps onto our letter I. It ended up looking more like colourful candy popcorn than anything else, but my guy was happy with it.


I went onto our local library's website to see if there were any alphabet books that went with the letter I, and came up with this one. I checked it out, and put it aside until our letter I day, when we pulled it out to read. I didn't read it first, which I normally do with children's books I borrow. It turned out that this was not, strictly speaking, an alphabet book. The only letters that it highlighted were the ones in the word 'Inuksuk,' while I thought it would have arctic terms for all the letters A-Z. Kind of disappointing, but not a huge deal.


Day Two: I is for Ice Cream.

This may be his favourite alphabet moment to date.


* I remembered this number ice cream cone visual from our Joy School numbers lesson, and made some for us to use. First I had him stack the scoops from 1-5, then from 5-1. Then I flipped over the scoops so that the number was face down (to avoid confusion) and we looked at some simple adding and subtracting equations. Ie: 2 scoops plus 2 scoops makes how many? etc.

* We coloured an ice cream colouring page

* We played an ice cream computer game here. (It focuses on colours and counting)


* But the happiest moment of the day, hands down, was when I surprised the kids with a trip to Dairy Queen! Everyone got a child's size sundae and we sat in a booth, and enjoyed every last lick.


Day Three: I is for Iqaliut


*We spent this day learning about Canada's North, and the people, environment, and heritage it holds.
*We used rocks to create our own Inuksuks


*We watched a segment from the Planet Earth DVDs we own, and I found the corresponding clip on Youtube, just for you!


*We ate fish for lunch.

* We build our sugar cube igloo


Day Four: I is for Instruments


*We recited and sang the nursery rhyme, "Hey Diddle, Diddle."

*We played on our piano

*We listened to music on the stereo


* We made a couple instruments from household objects. These shakers are paper towel tubes that we decorated. The ends are sealed with wax paper held in place by rubber bands. We filled one tube with a couple tablespoons of uncooked rice, and the other with the same about of popcorn seeds. Then we shook them to hear the difference in the sounds they produced.


*We made this drum from an empty Nestle's Quick can. Again, decorated. Our drumsticks were the markers we used.

*We read the Shel Silverstein poem, "Ourchestra."

Related Posts Plugin for WordPress, Blogger...