Showing posts with label Thanksgiving. Show all posts

Thursday, October 27, 2011

Best Pumpkin Cupcakes

Technically, these are muffins. But I added frosting, so I think that officially marks the end of Muffin Territory, and brings you straight into Cupcake Land.

I've got to say, if I had just read this recipe, I never would have tried it. I don't do that whole 'healthy living' thing that often, and anything that calls for bran qualifies. But these really are fantastic. I definitely prefer them to the Pumpkin Muffin recipe I already posted, but these are a little more time consuming.

I got the recipe from a Joy School mom. This is what she made her dinosaur cake with that was so delicious.


Muffins:

1 1/2 cups flour
1/2 cup oat bran
2 teaspoons baking powder
2 teaspoons pumpkin pie spice
1 teaspoon baking soda
1/2 teaspoon salt
1 cup canned pumpkin
1/2 cup finely grated carrots
1/2 cup buttermilk
1/2 cup honey
1/4 cup butter or margarine, melted
1 egg
1 teaspoon vanilla
1 teaspoon orange zest
1/2 cup chopped walnuts (optional)

Preheat your oven to 375, and spray your muffin tin with non-stick spray. In a large bowl, combine first six ingredients and mix to combine. In a separate bowl, combine remaining ingredients and mix well. Add the wet ingredients to the first bowl, and stir until it is all moist. (The batter will be thick). Spoon into muffin cups, and bake 20 minutes, or until a toothpick comes out clean. Remove the muffins to a wire rack and let cool completely before frosting.

Butterscotch Icing (I have to say, this icing is really what makes these so fabulous!)

1 cup brown sugar
1/2 cup butter
1/4 cup milk
1/2 teaspoon vanilla
about 2 cups icing sugar
Mix brown sugar and butter in a medium saucepan. Cook over medium heat until sugar is dissolved. Bring to a boil, and cook 2 more minutes. Add the milk, stir until it comes back to a boil. Remove from heat, cool to lukewarm, add vanilla. Gradually add icing sugar until it is a consistency you like.


Gently hold the muffin and dip the top in the icing. As you lift it from the pan, give it a little swirl. Let the icing set. Add a decorative topper, if you want.

ENJOY!

Sunday, October 9, 2011

The Gratitude Tree

Happy Thanksgiving!

This year, I wanted to do something to emphasize the reasons behind this holiday. It isn't a major one around here, and we really don't spend weeks and weeks preparing for it, but I think it is still has the potential to be very meaningful and important in our lives, if we let it.

So after we ate our feast this afternoon, I showed the kids this short video online:


At the end of the clip, it asks, "What are you thankful for?"

To answer that question, I pulled out something I made our family last night I will call a 'Gratitude Tree.' (I'm sure I saw a similar idea somewhere years and years ago, but I really don't know. Sorry I can't reference well.)

I made the tree base from some brown poster paper last night. I thought it looked okay until I set it up, but now I think it kind of looks like a giant hand reaching out of the ground. Anyway....


Then I spent hours tracing and cutting out leaves from paper in various autumn tones. Hours.


Then, I chose several leaves and wrote down a few of the many things I am thankful for on them.


I pulled out all these things after the video clip, and explained that everyone was going to get five leaves, and they needed to think of five different things they were thankful for, write one on each, and that when we were done we'd put them on the tree.


I loved how quickly they filled up their leaves. And the things they thought of were great! They ranged from our family trip to Disneyland a year-and-a-half ago, to the food we had at dinner, to their school, to their toys, to their favorite animals, to their family. It was so wonderful to see what they came up with. I had a few left over leaves, and they insisted on filling those up too, and then my daughter made a few more because she had more ideas she wanted to include.


My plan was to just tape them on the tree to make a beautiful holiday reminder, but my oldest had the idea to turn it into a game, and we did it blindfolded, kind of like 'pin the tail on the donkey.' It worked out well, even if the tree looked a little more 'scattered' than it would have otherwise. What is important is that they enjoyed doing it, and really got the message of the activity.

Here is our finished tree.


I am so happy I took the time to do this with them. I hope it is something they will remember.

Saturday, October 8, 2011

Pumpkin Muffins

I was feeling festive when I woke up, so we tried a new muffin for breakfast today. It was easy and quick, and to be honest, tasted better than I had really expected them to.

Recipe from Company's Coming, 'muffins and more'

In a large bowl, combine 1 1/2 cups flour, 1 teaspoon baking powder, 1 teaspoon baking soda, 1/2 teaspoon salt, 1/2 teaspoon cinnamon, 1/2 teaspoon nutmeg, 1/2 teaspoon ginger, 1/2 cup raisins (I skipped this, since none of us really like raisins in our baking)

In a smaller bowl, beat 1 egg until frothy.


Mix in 1/4 cup sugar,1/3 cup oil.


Add 1 cup cooked pumpkin puree (not pumpkin pie filling, just plain pumpkin) and 1/2 cup of milk.


Mix it up.

Make a well in the dry ingredients, and add the wet ingredients. Mix until moistened.


Fill greased muffin cups 3/4 full. Bake at 400 for 15-20 minutes. Let stand 5 minutes in pan, then remove to cooling rack.


Serve them warm.


Like I said, I was pleasantly surprised by these muffins. Warm with butter and honey they were really, really yummy. We ate them until the basket was empty.


I made them in honor of the Thanksgiving weekend, but my kids pointed out that we could make them again in just a couple of weeks for Halloween, too!

Friday, October 7, 2011

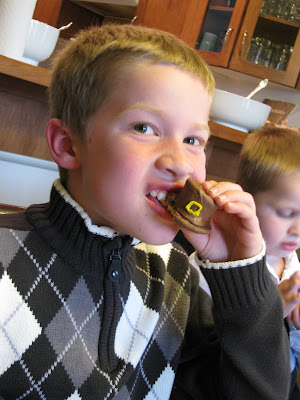
Pilgrim Hat Cookies

I don't know what is like in your house, but my kids don't really like the traditional Thanksgiving desserts. Pumpkin pie, pecan pie, or carrot cake are not things that they get excited about. In fact, they trigger reactions that are quite the opposite. Dread, perhaps.

So yesterday I was looking around online (thank-you, Internet) looking for something that they would enjoy that would be festive and fun for them. And I found it at Familyfun.com. Pilgrim Hat Cookies.

You don't need much by way of ingredients:

You need some cookies that have chocolate on one side, (I used these last year for the Turkey Treats too), marshmallows, chocolate chips, and yellow icing.

Step 1: Melt the chocolate chips


Step 2: Skewer a marshmallow.


Step 3: Dip and swirl the marshmallow around in the melted chocolate, using a spoon to help if you need to.


Step 4: Carefully drop the chocolate covered marshmallow onto the chocolate half of the cookie. (Use the toothpick to spread out the chocolate on the top if you have any white marshmallow showing)


Step 5: Leave the marshmallow cookies until the chocolate is set.


Step 7: Pipe a small square of icing to be the buckle on the front of the hat.


Step 8: Enjoy!


These were a big hit, and the kids had fun making them with me. If I had any suggestions, it would be to make more than you think you'll need. I thought two each would be plenty, but they were all asking for more and more. Maybe next year I'll triple the batch!

Tuesday, October 4, 2011

Thanksgiving in Song and Dance

Here is a quick and easy idea that my 4-year-old came home with from preschool yesterday....and we've been doing it almost non-stop ever since.

The Turkey Dance!
What is that? Well, everyone knows the Chicken Dance, right? To make this a Thanksgiving activity, his preschool teacher played the same music and did the same dance, but when you do the clapping part of the dance, you also say "Gobble, gobble, gobble, gobble."

Ta-da! Instant Thanksgiving Fun!

Saturday, October 1, 2011

Thanksgiving Storybooks

We got a few books from our local library last week to get us in a Thanksgiving mood and I thought I'd pass on the titles in case you were looking for something to read with your littles.

Franklin's grandparents aren't able to travel to his home for Thanksgiving this year. Franklin is disappointed, but in the end their whole community has a wonderful feast with his family, and he has a happy Thanksgiving after all.
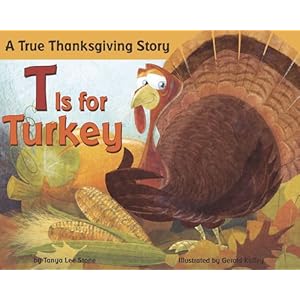
This was a good book to get some information (very light, and easy for kids) about the holiday's origins. When we started reading it, my boys asked if we were starting our Letter of the Week project over again, since many titles were 'A is for,' 'B is for,' etc. Ha! I learned a few things myself!

Arthur is directing the school Thanksgiving play, and everyone has an idea of which part they want to play, but no one wants to be the turkey at the end. What is Arthur to do?

Hope you enjoy, and have a Happy Thanksgiving!

Monday, October 11, 2010

Thanksgiving Pilgrims

Here is a cute Thanksgiving decoration that you can make together!


It's Peter Pilgrim! What you need: a brown paper bag (lunch size), black construction paper, yellow construction paper, flesh-toned construction paper, 3 buttons, googly eyes, markers, stapes and stapler, glue, scissors.
First cut out the shapes you'll need:

You need to cut out:
flesh toned paper: two arms and hands, 1 circle for the face
black paper: two feet, two small squares, one long rectangle, 1 hat shape
Yellow paper: two bigger squares

Glue the long rectangle across the paper bag. Glue the yellow square in the center, then the small black square in the center of that to create a belt and buckle.

Glue on the buttons, feet and arms

Crumple up some newsprint and stuff it into the lunch bag.

Fold over the top and staple it closed.


Glue the hat onto the head, add the yellow and black squares to make another buckle.

Glue on googly eyes and use markers to make a face.

Glue the head onto the top of the bag.


We had such fun, we made a whole bunch of Pilgrims! Happy Thanksgiving!

Wednesday, October 6, 2010

Turkey Treats

Who wouldn't want to gobble up one of these yummy Thanksgiving Turkey Cookies? They are so quick to make, since there is no baking involved at all, and great fun to do with the kids.

First, gather up all your supplies. You'll need a package of thin circular cookies, (I used Peak Freans' Family Digestive), candy corn, chocolate chips, small red jelly beans, chocolate malt balls, and a can of frosting. (You could, of course, use your own homemade frosting, but you don't need too much and it would be kind of a nuisance to get the kitchen all messed up for just that.)

Take 1/3 of the cookies, and cut them in half with a sharp knife.

Spread frosting on the half-cookie.

Arrange the candy corn to look like a fully turkey tail.

Place a chocolate malt ball in the center of the tail fan.

Spread or pipe a line of icing down the center of an uncut cookie, prop up the tail and hold it in place for a second till it sticks.

Use a dab of icing to attach the jelly bean and the chocolate chip for the turkey's face and the wattle. You're done! So cute! So quick!

Then, all that is left to do is to 'gobble' them right up!
Related Posts Plugin for WordPress, Blogger...